🎥 OBS Setup – Stream Slugger
Setting up OBS Studio for Stream Slugger is quick and straightforward. On this page, we'll guide you through the basics to get started, including recommended settings and best practices.
📢 Full video tutorial at the bottom of this page!
✅ Prerequisites
Before proceeding, make sure you have:
- OBS Studio installed (version 29 or higher recommended)
- A stable internet connection
- Your Stream Slugger application running
📥 Installation in OBS
To connect Stream Slugger with your stream:
1. Select your Main Scene
Open OBS and choose your main streaming scene — for example: Main Scene.
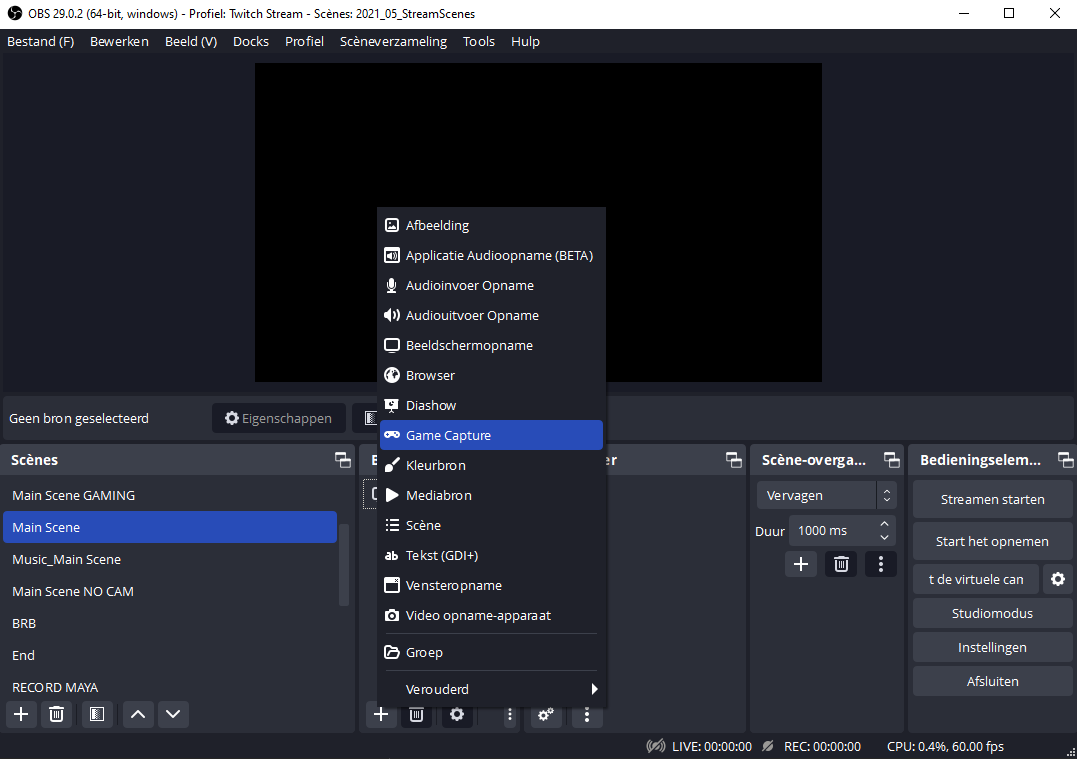
Then click the ➕ (Add) button to insert a new source:
2. Add a Game Capture Source
Choose Game Capture as the source type:
3. Configure Game Capture Settings
- Set Mode to:
Capture specific window - In the Window dropdown, select the running
Stream Sluggerapp. - Enable the option: ✅ Allow transparency
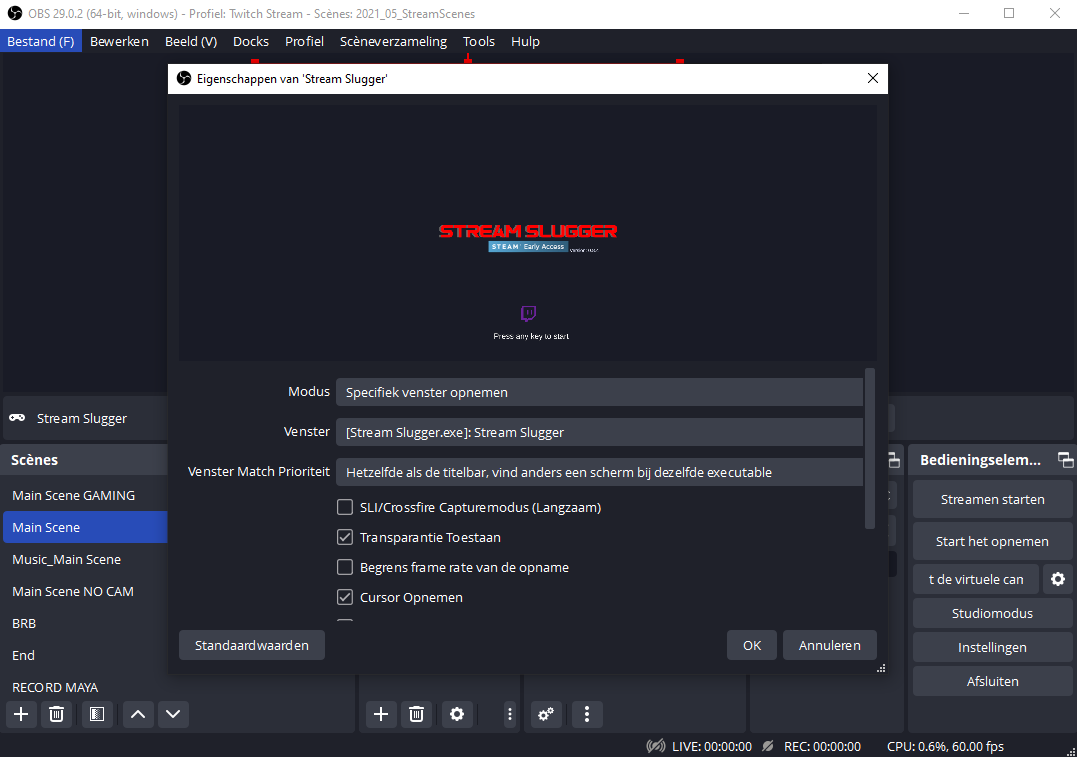
💡 Transparency allows Stream Slugger overlays to blend smoothly with your scene.
4. Resize and Position the Window
After selecting the Stream Slugger window, resize it to fit your stream layout.
We recommend:
- Setting it to match the full resolution of your stream output (e.g. 1920×1080)
- Positioning it above all other layers in your scene — so characters appear in front of your main content
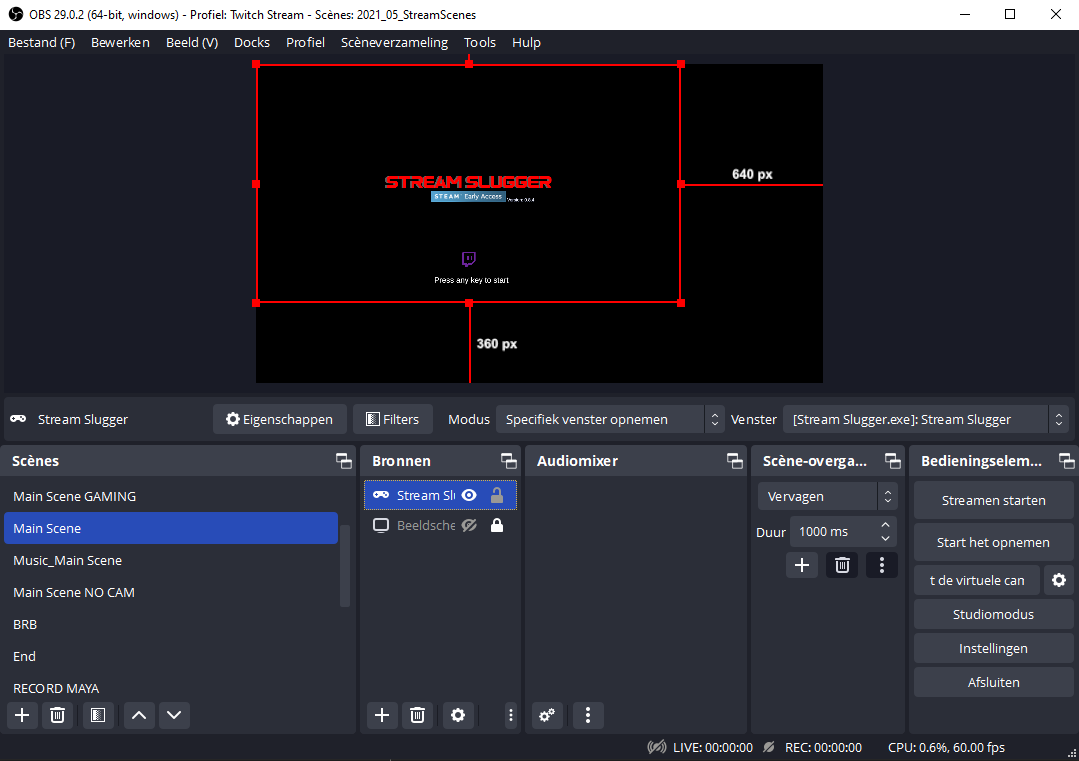
🧠 Pro Tip: Place Stream Slugger on top of your gameplay, browser, or any screen capture so viewers always see the characters clearly.
🎬 Video Tutorial
Want to follow along visually? Watch our setup tutorial below:
🙋 Need Help?
If you run into issues or have questions, reach out on Discord.
🚀 You're now ready to stream with Stream Slugger via OBS. Happy streaming!